 Same Day Dispatch Mon-Fri Before 2PM

 Free UK Delivery on Orders Over £50
-
 By
Jonny Tennant
By
Jonny Tennant
- 25/08/2022
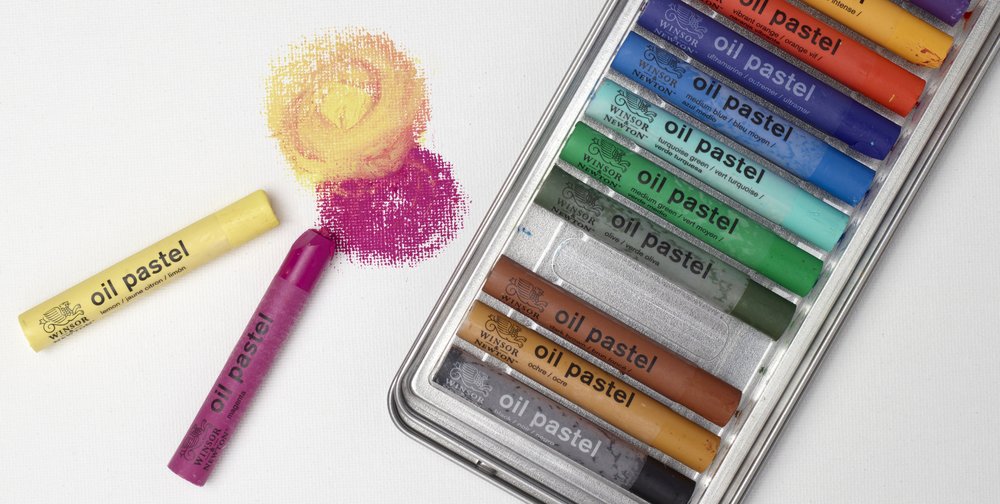
How to use oil pastels
How to use oil pastels

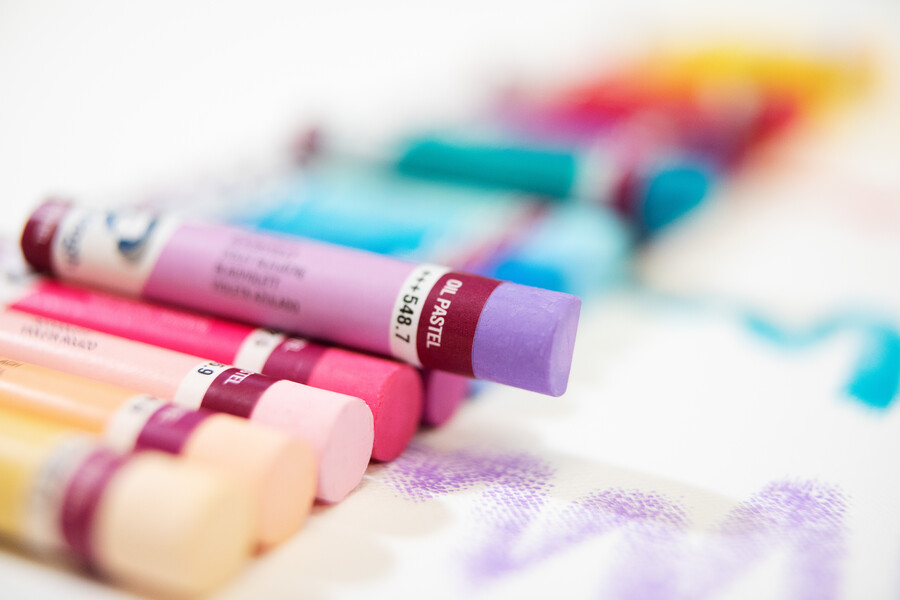
Oil pastels are a unique way to capture beautiful, atmospheric images – with the familiar feel of a childhood crayon.
There’s nothing childish about the possibilities oil pastels present. Build up layers of colour to construct a colourful, vibrant effect suitable for still life, portraits, landscapes and everything in-between.
We stock oil pastels from top brands like Sennelier, Winsor & Newton, Daler Rowney and Inscribe
What are oil pastels?
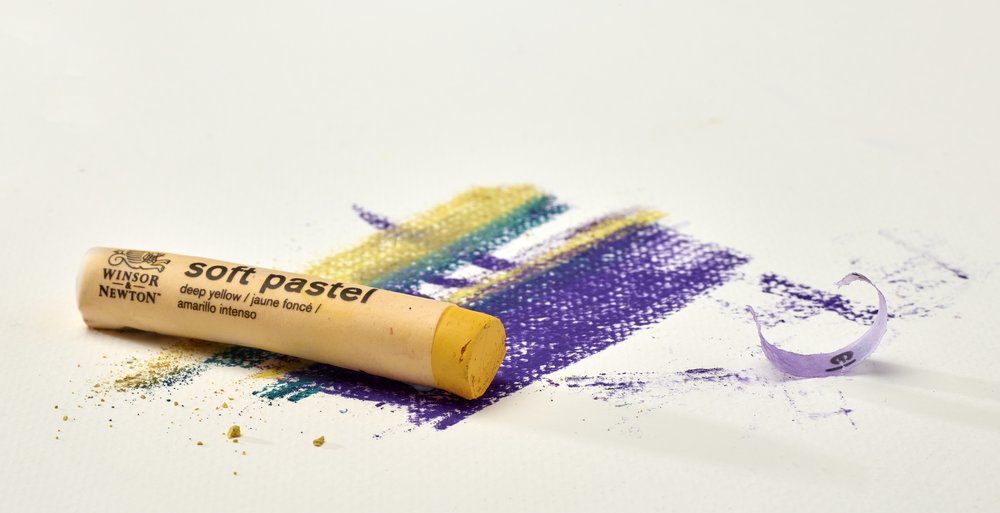
Similar in appearance to traditional crayons, oil pastels are formed of pigment blended with non-drying oil, bound together with tax.
Oil pastels are small and fit comfortably in your hand, offering strong control and versatility. Fun and simple to use, oil pastels offer opportunities for endless experimentation.
Getting started with oil pastels
One of the main benefits of oil pastels is how simple they are to pick up and use. You’ll only need a surface to work on and a set of pastels to get going.
What surface can I use with oil pastels?
Oil pastels can be used on lots of different of surfaces, including canvas, card and paper.
We’d recommend using quality artists’ paper when working with oil pastels – especially those with a strong texture. Pastel paper is also an excellent choice, as it’s specially made for use with all types of pastel.
Textured paper will allow you greater control over your artwork and can be used to form interesting compositions and effects depending on the pressure you apply.
How to blend oil pastels
Oil pastels are made for blending – learning to master this process will help you get the best from them.
To blend oil pastels together, put the two shades side by side – slightly overlapping, then blend together using a brush.
If you don’t want to use a brush, you can blend using your fingers. Make sure you clean the tips of your fingers between each colour blend to avoid marks.
Building up your composition
Oil pastel artwork is created using layering – building up coats of pigment until you’ve created the effect you’re looking for.
Start with a base layer – this is where you’ll sketch out the basic shapes of your composition. Don’t worry about being too neat here – you can be as expressive as you feel.
You’ll cover this layer multiple times as you work, so you’ll have a chance to tidy up any rough edges then.
Top tip: Keep a spare scrap of paper at your side while you work to use for testing different colour combinations, before adding them to your artwork.
Adding a base layer of colour
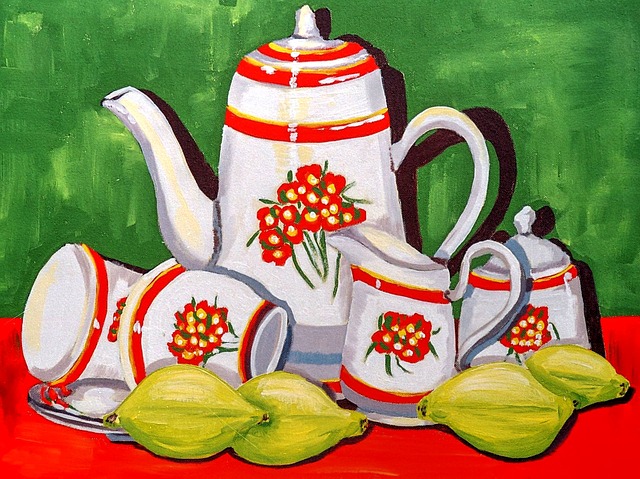
The next stage is building up a base layer of block colours. You’ll want to work dark to light for this, so start with the darkest shade you’re planning on using.
You can mix colours here to bring the hue down, so example if you’re creating a dark red, you might want to add in brown or black.
Top tip: Use black sparingly, as it might alter the shade more significantly than you’d hoped for.
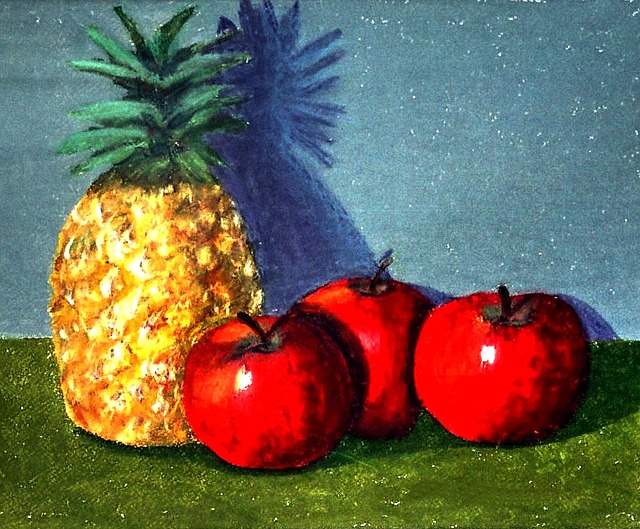
Now, you’ll really bring your artwork to life. Add more layers of colour – using a concentric circle motion to deepen the pigment. Finally, use white to add highlights of light to your image.
Oil pastel techniques
If you’ve mastered the basics, explore these tips and techniques to bring your oil pastel artwork to the next level.
Making colours paler
If the oil pastel you’re using has a pigment that’s too strong, you can dampen it’s colour into a paler shade. Simply blend over with a white oil pastel and you’ll gradually scale back its vibrancy.
Adding shadows
To create shadows, try using a combination of dark brown and light blue, rather than just black. This gives you opportunities to explore different tones and adapt the darkness, instead of only one block shade.
Blending using oil
If you want a glossier effect, you can blend colours together using oil. Apply your pigment as usual, but use a brush that’s been dipped in oil to combine them.
Edging
You can sharpen up the edges of the main objects using the surrounding colour – try to use a sharper point to do this. A pencil sharpener can be used to give you a more distinct line.
Create straight lines using tape
If you’re looking to create sharper lines within your artwork, try using masking tape to frame it. This way, you can blend right up to the masking tape, then remove for a sharp, clean line.
Avoid smudging
One thing to remember while using oil pastels is that they smudge easily. Be mindful of where you rest your hand while you’re working to avoid smearing your piece.
As oil pastels are made using non-drying oil, they’ll never truly set, so you be careful when handling your work to avoid smudges.
Once you’ve finished your piece, you’ll want to finish it to ensure it lasts. To do this, you’ll need a pastel fixative. These are specially formulated to avoid impacting the colour of your work too much.
To use a fixative, spray a light layer over your piece. You may need a couple of applications before it’s set, and less prone to smudging.
If you’re keen to get started with oil pastels, we stock a range of exceptional quality sets from top brands.